1.3W Blue Laser Build
.jpg)
History and Precautions:
Laser technology has come a long way. Back in the day, the first compact disks came out using infrared lasers. People demanded more information to be put on a CD. Eventually the DVD player came out, and this was made possible by shorter wavelength red lasers that could store more information in a smaller area. The need to copy these disks necessitated higher power lasers, and thus burner diodes were born. The hacker world very quickly dissected these to make very strong portable lasers. For reference, this is 300mW:
Some new players have emerged over the years with the quest to jam more information on those same size disks. Blu-Ray, which honestly should be called "Violet Ray," uses a ~405nm wavelength diode. They started off weak, just as the DVD did. Now, there are burners which can pump out hundreds of milliwatts just like the DVD's. For reference, a standard legal red laser pointer is under 5 mW. This is an adjustable low power bluray pointer we made a while back. It appears blue because my camera sucks, but looks violet in person:
In addition, high powered lasers have also recently found another use in projector technology. Some brands now utilize extremely powerful blue lasers as the light engine for the projector image. I will spare you the details on how they convert the colors, but the punchline is blue lasers are now terrifyingly powerful. We are talking ~2 WATT capable from a single diode. This is about 400 times more powerful than a regular laser pointer. It burns skin and objects instantly, and one TINY mistake will have you blind.
Disclaimer:
The information I am posting is aimed to be scientific and educational. I do not endorse illegal use of lasers, and I encourage that all proper safety equipment is used. Follow all local laws and ordinances before engaging in building or using these devices. I am not responsible for any illegal actions used as the result of this information. The responsibility is purely on you. Don’t go blind, and don’t go to jail doing something stupid!

I decided to build a 445nm blue laser of reliable power output. The housing is a popular “Aurora C6” DIY flashlight housing from DX (slow to ship). The diodes themselves easily fit in the popular “AXIZ” laser housings with adjustable focus. While any lens will technically work, one should be purchased for the range of wavelength being used, or you’re wasting a lot of output through your lens. The “3 element G1 & G2” glass lenses are popular and more efficient than the standard bluray/445nm lenses. I used the less expensive kind. Other than this, you will need the driver and batteries.
.jpg)
I chose a less common driver method, simply because I already had it around. It was actually designed for a high powered LED flashlight. It’s a simple buck circuit with 3 AMC7135 current limiting chips and a diode for reverse polarity (battery direction) protection. It is current limited at 1050mA, and voltage is variable as long as it is above supply. The chips naturally drop the voltage a bit too (~0.15v), and you will have to refer to the datasheets of all components on your board for accuracy in your calculations. Or, you can always make a dummy load to simulate your laser and use a multimeter for real world results. You can measure current by connecting the circuit between the battery negative and the metal at the tail cap, but only on NON-PWM (pulse width modulated) drivers like the one I am using. PWM drivers require fancy maths and an oscilloscope.
.jpg)
About buck drivers:
As a rule, the voltage supplied must be higher than the Vout (voltage to the laser diode), or it does not give full output. This means we must pay close attention to the forward voltage, and this particular laser diode is much higher than your standard CREE LED the driver was intended for. The absolute limit on the chip is marked as 7V, and the forward voltage on these laser diodes are around the lower 4 volt range where it lases (depending on factory variations). So we have a narrow 4-6.5V input range. The driver efficiency is directly related to the difference between Vin (battery source) and Vout (voltage delivered). The greater the difference, the less efficient and hot it becomes. This makes battery configuration extremely important. This is in contrast to the more expensive buck-boost drivers that can increase the voltage appropriately (above supply) as well as current limit.
This driver and laser necessitates PRIMARY (non rechargeable) CR123A lithium batteries to be used for maximum output. Here’s why: Rechargeable (RCR123A / 16340) lithium cobalt batteries WILL BREAK THIS DRIVER, since they are 4.2V fully charged. This is a full 1.4V higher than the maximum the chips can handle when wired in series. A single large 18650 will work at 4.2V fully charged, but it will not supply full output and will quickly drop below lasing voltage as it is used. Two primary CR123A’s are ~3V, and will not exceed 7v in series… correct and safe for driver!
.jpg)
I just bought a new metal lathe, and this was my first chance to use it. I figured I would give a try making my first heat sink with it. This is absolutely essential to have if you want a duty cycle longer than a few seconds in the AXIZ housing alone. I started with 1.2” 6061 aluminum round stock. We faced it off. I measured the AXIZ laser housing diameter, used a drill bit that was marginally smaller than the diameter. You always want to have the hole be a little smaller than what you plan to press fit into it. Giggity. I would give the exact diameter of the AXIZ housing, but I discovered that they vary!
.jpg)
We measured the internal diameter of the flashlight head. Then, we slowly reduced the diameter to that size, frequently checking with calipers along the way.
.jpg)
Cut off:
.jpg)
.jpg)
Nice and pretty
.jpg)
The end result was a perfect fit into the head of the light.
.jpg)
.jpg)
The laser housing itself needed to be press fit.
.jpg)
We applied thermally conducting grease and evenly applied pressure through a ratchet socket to avoid damaging wire/components in the process.
.jpg)
.jpg)
.jpg)
We left a tiny lip so the diode would stop right in place at the end of the heat sink. Perfect!
.jpg)
.jpg)
.jpg)
.jpg)
Adjustable lens cover attached on this photo, which I didn't end up using:
.jpg)
I cut off the end of the laser housing to have it be flush with the driver holder (which is a bit FUBAR from messing with it on prior projects).
.jpg)
It was all a matter of assembly at this point. My flashlight driver was 17mm diameter made to fit in the retaining ring of the Aurora flashlight host above. It is more convenient than your average micro laser driver designed to fit inside of the AXIZ housing because this flashlight driver doubles as your solid + battery connection.
Make sure you have everything ready and in place before soldering. If you don’t know how to solder, consult youtube. Ground yourself out so static shock does not blow your sensitive laser. If soldering your diode pins, try to ground them out and apply a bit of heat absorbing metal contact to reduce the chance of thermal breakdown. I didn’t have to do pins this time, but I will add pictures in the future when I do. Ground out any capacitors on your board before connecting, or you risk discharging them into your laser as well! Luckily, mine did not have capacitors to worry about.
.jpg)
Once you have soldered, make sure everything is nice and tidy, and wires are not becoming tangled by screwing your flashlight into place.
.jpg)
Before I turned it on, I IMMEDIATELY went for my laser goggles designed for this wavelength. I value my sight. The goggles also made it easy to see the focal point and adjust the focus appropriately. I will have you know that you want to ADJUST IT WHILE IT IS OFF. At these output levels, you can burn your fingers if it is in the path of the beam.
.jpg)
We tested the output on a Coherent thermopile style laser meter, and it put out 1329 mW. Basically, it’s a 1.3 Watt laser.
.jpg)
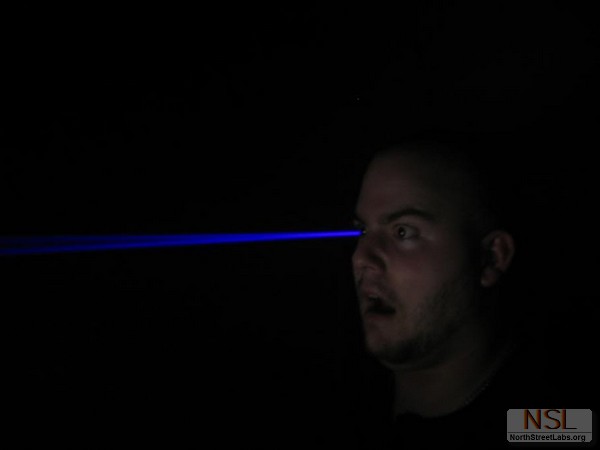
You can push these lasers a bit higher and I could have easily added another AMC7135 chip on my driver board, but I wanted reliability. Here's a video showing just how dangerous these things can be.
This output can be seen for miles, light matches in infinite focus, pop balloons with ease, and other PURELY SCIENTIFIC PURPOSES. We plan to experiment with using this laser on our CNC machine to engrave/cut thin objects - we will post whether or not this is worthwhile once we finish testing. Thanks for reading, and stay safe!