Nintendo Zapper 2W+ Laser
Update! 11/18/12. See bottom of page for updated video and pictures of upgrade.

History and Precautions:
Laser technology has come a long way. Back in the day, the first compact disks came out using infrared lasers. People demanded more information to be put on a CD. Eventually the DVD player came out, and this was made possible by shorter wavelength red lasers that could store more information in a smaller area. The need to copy these disks necessitated higher power lasers, and thus burner diodes were born. The hacker world very quickly dissected these to make very strong portable lasers. For reference, this is 300mW:
Some new players have emerged over the years with the quest to jam more information on those same size disks. Blu-Ray, which honestly should be called "Violet Ray," uses a ~405nm wavelength diode. They started off weak, just as the DVD did. Now, there are burners which can pump out hundreds of milliwatts just like the DVD's. For reference, a standard legal red laser pointer is under 5 mW. This is an adjustable low power bluray pointer we made a while back. It appears blue because my camera sucks, but looks violet in person:
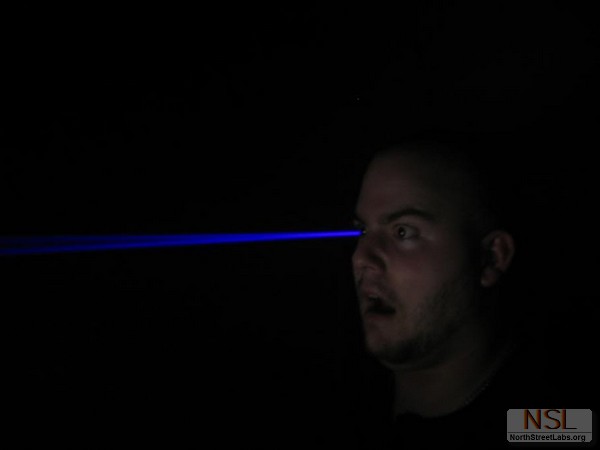
In addition, high powered lasers have also recently found another use in projector technology. Some brands now utilize extremely powerful blue lasers as the light engine for the projector image. I will spare you the details on how they convert the colors, but the punchline is blue lasers are now terrifyingly powerful. We are talking ~2 WATT capable from a single diode. This is about 400 times more powerful than a regular laser pointer. It burns skin and objects instantly, and one TINY mistake will have you blind.
These are my laser goggles. The one in the back left is for the ludicrous wavelengths. Before you make a laser, BUY THE GOGGLES FOR THE RIGHT WAVELENGTH AND POWER RATING.

Disclaimer:
The information I am posting is aimed to be educational. I do not endorse illegal use of lasers, and I encourage that all proper safety equipment is used. Follow all local laws and ordinances before engaging in building or using these devices. I am not responsible for any illegal actions used as the result of this information. The responsibility is purely on you. Don’t go blind, and don’t go to jail doing something stupid!
People asking me to build/sell lasers for them:
This is a combined response for the countless inquiries about details for making, selling, and producing parts for them. Let me start by saying we will not be able to sell completed lasers of this power level for obvious legal reasons. Building them yourself is fine, but selling them on our end is just not possible. We are primarily a maker space that simply enjoys creating things, so most of the things we do are not aimed for sale anyway.
On occasion, we do sell things locally just to recoup costs of materials so we can continue doing what we do. I would have no problem selling a custom heat sink to an intrepid tinkerer that wants to learn about lasers and LED lighting. We might make a few and put them on our website in the near future; for those who asked, I would periodically check in for updates. There are plenty of hobbyists who already sell parts online as well if time is of the essence.
I would strongly urge those who have no experience making lasers to start out with a far less powerful diode than we used. There is ZERO room for error with Class 4 lasers, and I don't want inexperienced people to rush into something they're not prepared for. Safety first. If new to the hobby, start readng up on some laser hobbyist forums; they're great sources of information. Be prepared to spend at least $80-100 on proper safety gear alone. (Do things right, and please don't be careless around others). It's a small price to pay in comparison to permanent eye damage and thousands in medical bills. That being said, creating something amazing with your own two hands can be incredibly rewarding.
Those requesting more educational information have been heard, and we will try to update the website to address any further questions.
The Build:
The plan was simple. Take a nostalgic NES "duck hunt" Zapper, and retrofit it with a ridiculously powerful laser.

Basic components: Batteries, driver, 445nm diode, housing, lens, key switch, wiring, heat-sink.
Required materials: Assorted hand tools, shrink wrap, solder, soldering iron.
I started by unscrewing the traditional zapper and inspecting the stock components.


You can scrap the electronics in the barrel of the gun entirely. Just unclip the wiring harness, and the whole cord comes right out with the unnecessary components. The switch and trigger mechanism is kept.


I was worried that the OEM electric momentary switch wouldn't handle my power needs, so I checked it out. It turns out Nintendo completely over engineered it, and the switch was more than capable handling ridiculous levels of current.

The factory trigger also turned out to be perfect; a full trigger pull does a momentary pulse exactly how I wanted. The stock design also allowed for a partial trigger pull for rare occasions I wanted a slightly longer burn time.

Desolder the electronics from the switch and throw it away (or reverse engineer it for some other project).

I reassembled the switch to the trigger housing, and I did a quick "proof of concept" test with a crappy 5mW red laser module. It works perfectly.

Video of trigger action:
Now it's time to make your power wire. Cut extra long length so you don't come up short when connecting things later. Pre-tin youre wires.


I had to heat-shrink both sides for this terminal.

Coming together. Yes, the wire size is excessive, but doesn't hurt!

For those worried about wires being too small during your build, some number crunching:

When I started this project, I honestly had no idea what kind of batteries I would be using. I liked the simplicity of a single cell, but the common cylindrical designs were just too shitty or too large for the handle location I chose. In addition, I would be forced to use a boost driver to get the voltage up up to lasing level. I aso wanted to keep the weight in the handle for balance & feel.

I diced up the interior plastic retaining box for the metal weight. It was slow and tedious, but easy with the right tools.


The space was mostly clear, but it looked messy and had some rough spots still protruding in the way.

I used a "beater" soldering iron to easily melt down sections of plastic that were stubborn to cutting.


For reference, I am including pictures of different types of batteries so you can decide what you want to do with yours. After clipping and melting away non-essential plastic, you should easily be able to fit two 16340//RCR123A even while resting in a battery case.

You will have to clip away select plastic supports to make room. I cleaned up cuts and made things flush by doing more melting with my "beater" soldering iron. You would probably have good luck with a hot knife, but I don't own one and work with what I have. Just have a rag handy to wipe away plastic so it's not burning away on your tool.


Keep your laser leads together until you're ready to mount to your driver to reduce static charge. In this build, I am using a 445nm M140 diode.
It was time to mount my diode to an AixiZ host to get enough heatsinking for soldering. Let me start by saying that there are actual tools you can buy to do this quickly and flawlessly every single time. I don't own one of these tools, and I am impatient.
I included this section to show how to do the full process, in case you don't purchase a completed module and want to do this yourself with common tools:

You basically just need a flat open cylinder small enough to push it into the housing and not crush the leads. I found a socket set and started pressing the diode in that way.

I put it in a vice to partially seat the diode.

Now, the proper position for the diode is NOT FLUSH as seen in picture below, but pushed in a bit further. You can clearly see how far to push it in when you really inspect the AixiZ housing (a few pics up); there is a lip inside the housing where the diode stops; this makes better contact for heat transfer. If you are uncomfortable simply pressing it with guesswork, either buy the mounting tool or measure the exact distance with calipers so you know how far to go. Just don't crush it!
Naturally, I was late to find out about the proper positioning, so I had to go back half way through this build and push it in further. That's why I don't have pictures to show proper seating. It's basically just pushed in a bit further. Oh well...
On a slightly unrelated note, take a moment to look at the diode's leads below. The diode was properly shipped with them connected by a little ball of solder; shorting the leads like this reduces the chance of static discharge before you're ready to solder connections.

Since I was desoldering the connection, I maintained it with this nifty clip. It also doubles as a method to pull heat away from the precious diode!

Solder your laser leads quickly to minimize heat to the diode. I was extra paranoid about heat transfer, so I placed aluminum plates around it to help.

Heat-shrink the leads for protection.

I did a quick test on a small driver to make sure it was still working, and everything was fine! When finished testing, short your leads again.

You can buy premade heatsinks for your laser housing, but we wanted to make our own. We designed the heat-sink to serve 2 functions. Obviously, we wanted a little better heat transfer.

We also wanted our design to effortlessly hold the laser dead center for accurate aim with the gun's iron sites.

It automatically centers between the internal plastic supports with minimal adjustment! We started taking measurements of housing diameter (AixiZ) and stock plastic locations we wanted to take advantage of.


Sexy.


Depending on factory variations and drill bit sizes you have, you might need a set screw to keep your AixiZ housing in place.

Preferably, your AixiZ housing is tight enough to press fit. I initially used a set screw, but then I found another AixiZ housing that was tight! Factory variations are annoying. I'm leaving the whole process here for whichever method you do:
Apply thermal compound lightly around the housing. Use just enough to very lightly surround it. I dabbed and smeared with a paper towel.

We drilled a hole for the set screw. I don't have a collection of set screws, so we literally just went digging through our junk part bin for something that would work and found a matching drill bit:

Aluminum is soft. Our random set screw was strong enough to thread the aluminum by itself. We just dremeled off what wasn't needed.

If you plan to remove your set screw, dremel in an indentation for a flathead screwdriver. I ended up having to take it out this way after threadlocking, all to go back and properly seat the diode. Frowny face.

I decided to give small Lithium Polymer (LIPO) packs a try.

They have a nominal voltage of 3.7v with a peak of 4.2v at full charge. I wired the packs in series for a 7.4v nominal (8.4 full charge) supply voltage. Each pack is 750mAh rated, a relatively small capacity. The discharge rate, however, is very impressive. It's designed for RC vehicles boasting a "35C-70C" rating, meaning it can safely drain at a rate of 35x its capacity: way higher than the total drain of my laser driver. The charging circuit goes out the Zapper handle's stock hole, and will automatically balance the cells with my charger. At the time of this build, I'm just waiting for the RC "2S" balancing plug to come in the mail to finish it! I also have a tiny circuit to connect to this RC plug with voltage read-out and alarm, so I never over discharge! As is, a full charge should be good enough for approximately 30 minutes of run time.
Here's the plug i am waiting on to easily integrate charge/balance of my cells:

I used a 2.1A buck driver, "X-drive" from CajunLasers. This is a lot for this diode, but should be fine for my momentary duty cycle. Buck drivers require the supply voltage to be above the Vf (forward voltage) of the laser diode... which is in the mid 4v range. One Lipo cell alone wouldn't have been enough voltage for the job.

I started thinking this is going to be a really serious laser, so I should install some safety on it. I had a turn key switch, and I decided to toss it in the base. I just took my trusty "beater" soldering iron again and poked a hole where I wanted it mounted.

Snip way melted plastic with wire cutters to make it flush.


These key switches wire in series with the whole circuit; they handle the power fine. I believe I ordered them from Sparkfun a long time ago.

Hot glue works awesome for holding stuff like this in the position you want.

Pre tin your connections to make things easy.


If you are using a 2 cell configuration, wire them in series to add voltage. Google series wiring of batteries if you can't figure it out by the picture; it doubles your voltage but capacity remains the same as 1 cell. (Parallel wiring doubles capacity, but voltage stays the same).

Now just wire the whole gun in series. The key switch breaks the connection with your driver, as well as the trigger.
Before wiring to the driver, DRAIN ANY CAPACITORS ON YOUR DRIVER BOARD. Just short them out with wire or any metal contact. If possible, wear an anti-static ground wrist-band while soldering as well. Do everything possible to keep your diode safe!

This driver does not require heat sinking for the short duty cycles I am working with, so it's fine as is!
Now just complete the circuit and put things back together in the reverse order of how you took it apart! I threw on a couple last second rubber O-rings around the heat-sink to improve the centering.

Once again, WEAR YOUR GOGGLES. DON'T GO BLIND.

After initial testing, this thing is absolutely terrifying. I discovered that my laser meter tops out at 2W... which this Zapper rapidly passes. The meter quickly shoots to 1800+ , then just says "1" when topped out. This means the Zapper is AT LEAST 2W OUTPUT. I wear my laser goggles at all times when handling this thing and only turn the key right before use. That being said, it's been a fun build!
